Pre-Installation Planning for a New Commercial Roof Installation
Long before any materials land on your roof, a substantial amount of administrative work takes place behind the scenes. Moving from architectural blueprints to active site labor requires strict adherence to project specifications and code compliance. Understanding this pre-install phase helps property owners keep projects on track. For a deep dive into project scoping, explore our Practical Guide to Commercial Roof Installation.
Administrative Submittals and Approvals
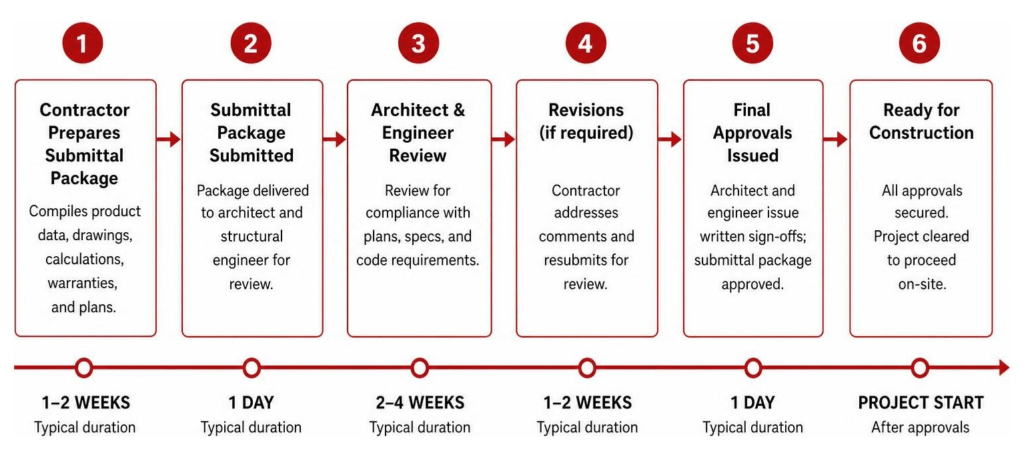
On typical commercial builds, administrative preparation takes 4 to 8 weeks before physical work starts on-site. The contractor compiles an extensive submittal package—often ranging from 30 to 120 pages depending on building size—containing product data sheets, system assembly drawings, wind uplift calculations, sample warranties, and safety plans.
Architects and structural engineers take 2 to 4 weeks to review and approve these submittals. Work cannot begin until these sign-offs are secured; starting early without written approvals creates severe contract liability and can void manufacturer coverage.
Pre-Job Conference and Contractor Certification
Before staging equipment, a formal pre-job conference brings together the general contractor, commercial roofer, building owner representative, and manufacturer technical field manager. This meeting establishes sequencing, material staging locations, safety protocols, and daily cleanup standards.
Manufacturer certification tiers directly dictate warranty eligibility. Top-tier manufacturer warranties—such as No Dollar Limit (NDL) guarantees—require contractors to hold special authorized or master installer statuses. During the pre-job conference, the contractor verifies these credentials with the manufacturer to ensure the specified installation meets all guidelines for final warranty issuance.
Substrate Verification and System Selection
The underlying structural roof deck dictates how a new roof system is attached and how well it performs over decades of service.
Preparing the Substrate for a New Commercial Roof Installation
A thorough deck inspection protects property owners from unexpected structural failures. Different structural materials present unique challenges:
- Steel Decks: Inspectors evaluate fastener pull-out resistance and check for hidden corrosion. Rusted steel decking requires replacement, which typically costs $7 to $14 per square foot installed, higher if temporary structural shoring is needed.
- Concrete Decks: Heavy structural concrete must be dry and free of spalling. Concrete patch zones need rapid-set repair mortars, which can add 2 to 4 days to the construction schedule.
- Lightweight Insulating Concrete (LWIC): Lightweight concrete holds moisture longer and offers lower fastener retention, often requiring fully adhered systems or specialized deck anchors instead of standard screws.
- Existing Assemblies: On tear-off or recover projects, electronic moisture surveys locate wet insulation that must be removed. State building codes limit buildings to a maximum of two roof layers, making full tear-offs mandatory when two roofs are already present.
Single-Ply, Multi-Ply, and Spray Foam Systems
Choosing the right membrane depends on building use, rooftop traffic, chemical exposure, and local climate conditions. For more details on material selections, check out A Guide to Commercial Roof Types.
| Roofing System | Typical Applications | Key Advantages | Primary Attachment Methods |
|---|---|---|---|
| TPO (Thermoplastic Polyolefin) | Retail boxes, warehouses, office buildings | Heat-welded seams, high solar reflectance, puncture resistance | Mechanically Fastened, Fully Adhered |
| PVC (Polyvinyl Chloride) | Restaurants, food processing, industrial plants | Superior resistance to animal fats, greases, and chemicals | Mechanically Fastened, Fully Adhered |
| EPDM (Ethylene Propylene Diene Monomer) | Large distribution centers, low-slope roofs | Excellent flexibility in cold climates, high UV resistance | Mechanically Fastened, Fully Adhered, Ballasted |
| Modified Bitumen | High-traffic roofs, severe weather regions | Redundant multi-ply protection, high impact resistance | Cold-applied adhesive, Self-adhered, Torch-down |
| Spray Polyurethane Foam (SPF) | Irregular deck shapes, retrofits, insulation upgrades | Seamless monolithic barrier, self-flashing, high R-value per inch | Fluid-applied spray adhering directly to substrate |
Attachment Methods: Fastened, Adhered, and Ballasted
- Mechanically Attached: Screws and stress plates secure insulation and membrane directly to structural decking. This fast, cost-effective method installs efficiently on steel or wood decks, with crews covering 10,000 to 15,000 square feet per day.
- Fully Adhered: Membrane is glued directly to cover boards using water-based, solvent-based, or low-rise foam adhesives. Fully adhered systems eliminate fluttering, offer high wind uplift ratings, and perform well on concrete or lightweight decks, running 6,000 to 9,000 square feet per day.
- Heat-Welded Seams: Thermoplastic membranes (TPO and PVC) use hot-air welders operating at 800°F to 1,000°F to fuse overlapping sheets into a single continuous, monolithic sheet.
- Ballasted Systems: Unattached membranes are held down using rounded river washed stone or concrete pavers (typically 10 to 12 lbs per square foot).
Managing Crew Production, Timelines, and Weather
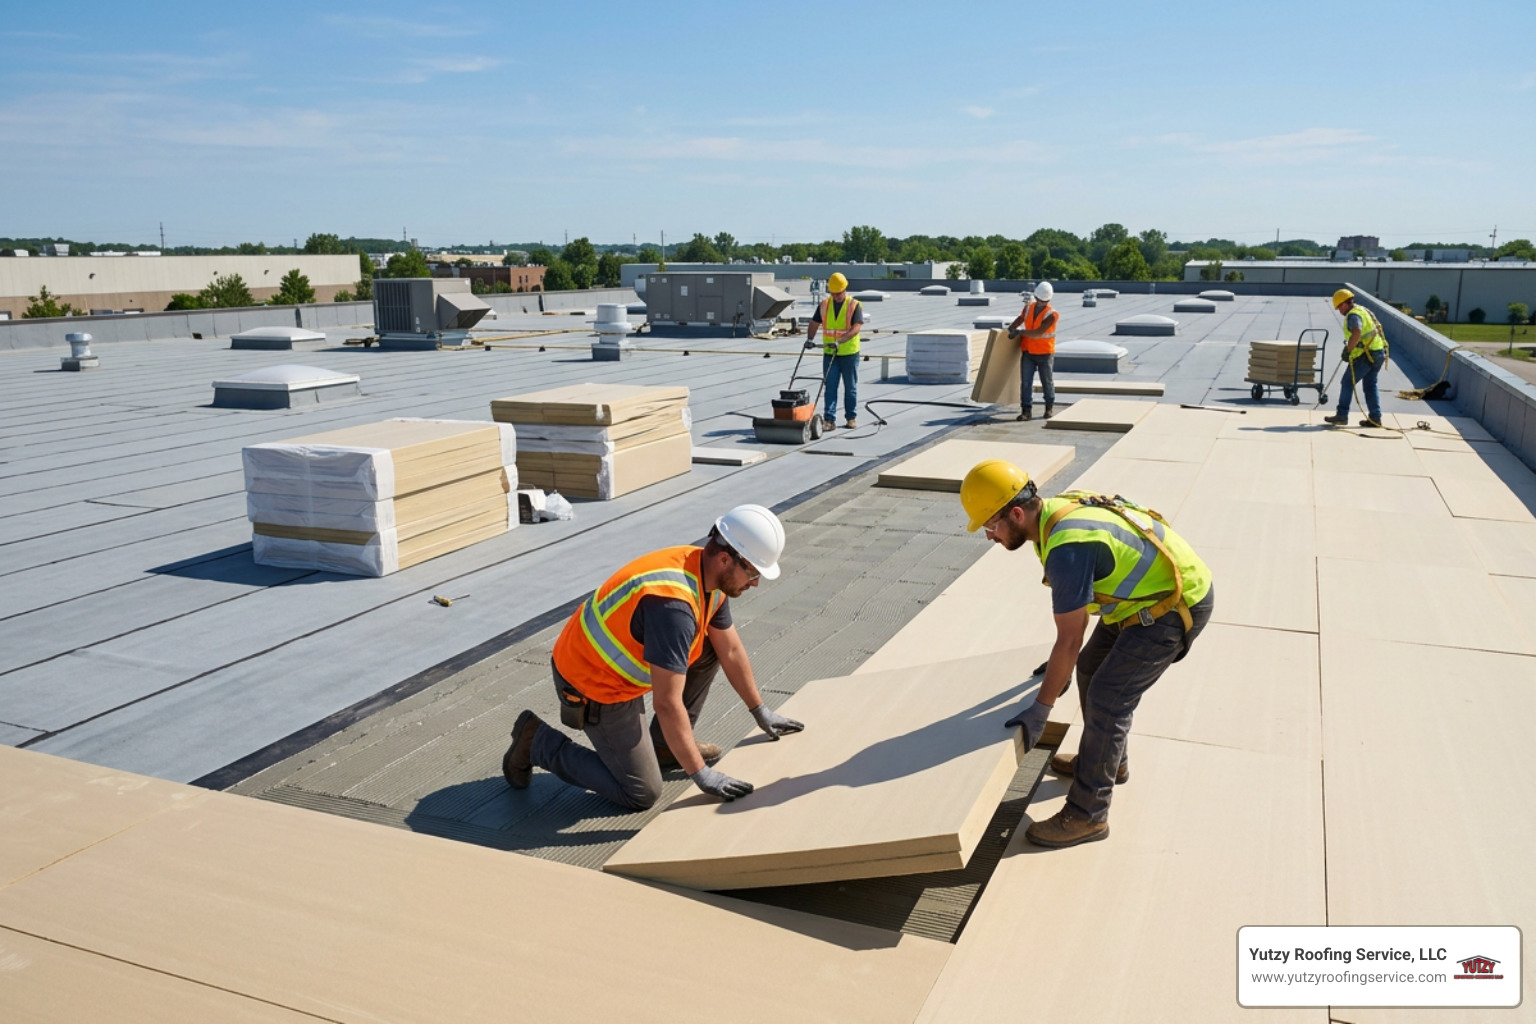
Commercial roofing projects are carefully calculated logistics operations where daily production rates drive strict schedules.
Project Duration and Daily Production Rates
Project timelines depend heavily on whether the project involves a new build, a recover, or a complete tear-off. On average, a standard 50,000-square-foot single-ply installation takes 15 to 25 working days from material arrival to final sign-off. Learn what to expect on-site with our overview on What to Expect During Installation.
Daily production benchmarks per crew:
- Tear-off of existing roof: 8,000 to 15,000 sq. ft./day
- Recover (no tear-off): 12,000 to 25,000 sq. ft./day
- Polyiso insulation lay (mechanically attached): 10,000 to 18,000 sq. ft./day
- Polyiso insulation lay (fully adhered): 6,000 to 10,000 sq. ft./day
- Mechanically attached TPO membrane: 10,000 to 15,000 sq. ft./day
- Fully adhered TPO/PVC membrane: 6,000 to 9,000 sq. ft./day
Crew sizes scale according to project size. A typical 50,000-square-foot build uses an 8 to 12-person crew, while major industrial facilities over 200,000 square feet deploy 18 to 30 technicians on the roof daily.
Seasonal Weather and Climate Considerations
Weather conditions significantly affect commercial installation timelines. Cold weather, rain, and high wind force work stoppages to maintain safety and material performance:
- Temperature Limits: Solvent-based adhesives and bonding cements require ambient temperatures above 40°F (5°C) to flash off properly. Hot-air welding equipment on TPO and PVC requires temperature adjustments in cold or windy conditions to ensure complete seam fusion.
- Moisture Protocols: Substrates must be completely dry before laying insulation or membrane. Trapping moisture leads to blameless system failure, wood rot, or wet polyiso insulation.
- Wind Uplift Restrictions: Unrolled membrane sheets act like giant sails in high winds. Installation stops when wind gusts exceed 20 to 25 mph to protect worker safety and unfastened insulation sheets.
- Schedule Buffers: Building owners in the Upper Midwest should account for a 15% to 30% weather delay buffer when scheduling installs during late fall, winter, or early spring.
Insulation Systems and Perimeter Detailing

While single-ply membranes get the spotlight, high-performing commercial roofs rely heavily on proper insulation layouts and edge detailing.
Insulation Layout, R-Value, and Tapered Systems
Modern energy codes (such as the IECC) mandate minimum thermal resistance targets, frequently requiring R-25 to R-30 continuous insulation across climate zones in Wisconsin and Minnesota. Polyisocyanurate (polyiso) rigid foam is the industry standard due to its high thermal efficiency per inch.
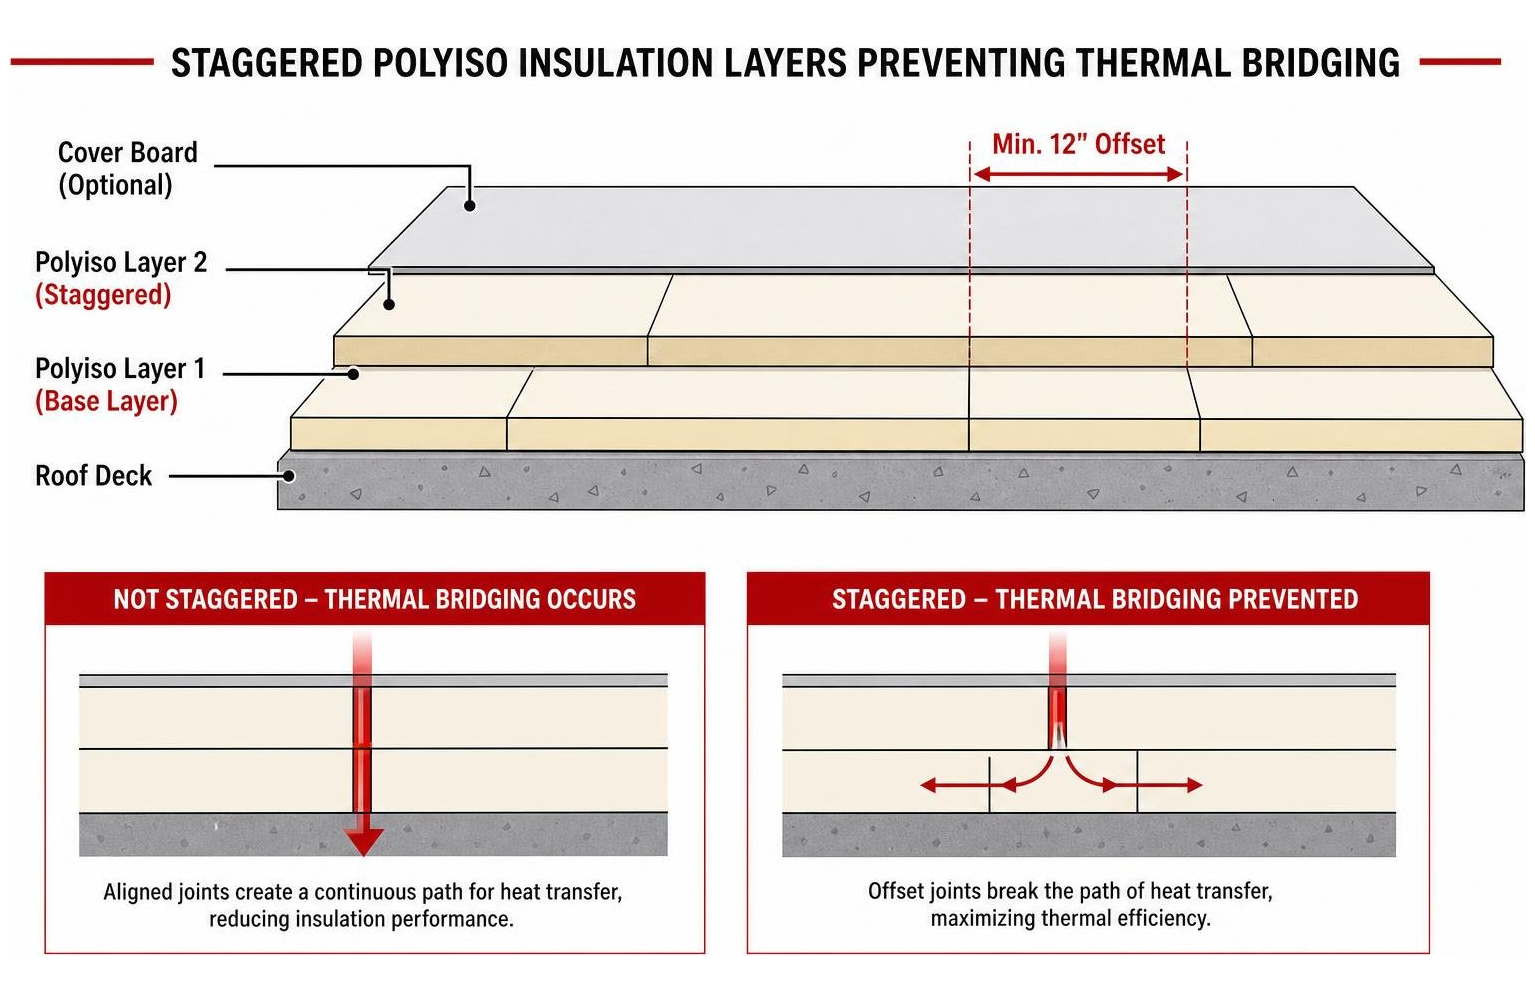
To prevent thermal bridging—where heat escapes through gaps between boards—insulation must be installed in at least two separate layers with all joints offset by at least 12 inches. High-density cover boards, such as 1/4-inch or 1/2-inch gypsum-based boards (e.g., DensDeck), are installed over polyiso to add foot-traffic protection, hail resistance, and fire resistance. Read more on selecting top components in our article on Best Roofing System Materials.
Low-slope commercial decks must shed water efficiently. Tapered insulation packages (adding $1.50 to $4.00 per square foot) create positive slopes toward drains and gutters. Tapered crickets built on the high side of rooftop HVAC units, curbs, and corners prevent standing water. Eliminating ponding water (water remaining on the surface for more than 48 hours) is critical, as standing water voids most manufacturer warranties.
Watertight Flashing at Drains, Parapets, and Penetrations
Industry studies show that over 90% of commercial roof leaks occur at penetrations, parapet walls, and edge terminations rather than within the open field membrane.
- Parapet Walls: Membrane must extend seamlessly up parapet walls, wrapping over the top coping wood nailers. Heavy-gauge metal coping caps engineered to meet ANSI/SPRI ES-1 wind uplift standards lock down parapet perimeters against severe storms.
- Roof Drains: Drains use sump pans set below roof deck level. The membrane strips directly into the drain bowl, clamped tight with a cast-iron ring and gravel guard to ensure water drains freely without leaking underneath the membrane.
- Penetrations: Pipe penetrations receive factory-molded pipe boots or custom field-fabricated membrane wraps heat-welded directly to the field sheet and sealed with stainless steel clamping bands and polyurethane sealant.
Substantial Completion and Quality Assurance
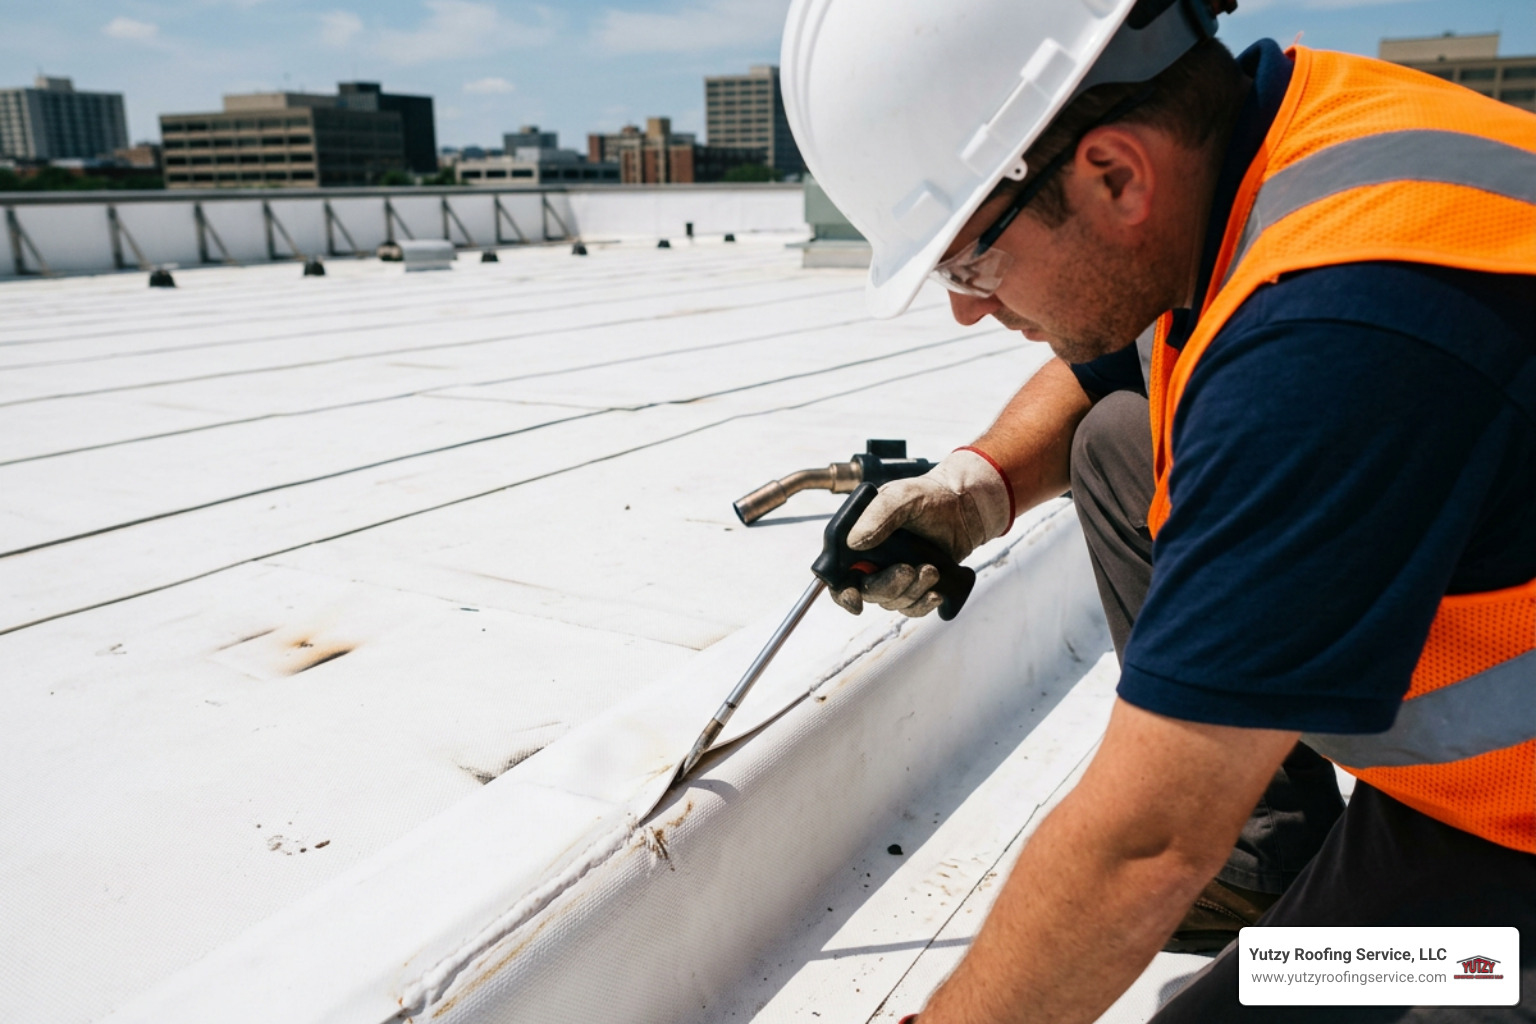
The final stages of a commercial roof project move from structural labor to quality verification and warranty activation.
Final Inspections and Warranty Registration for New Commercial Roof Installation
Once the roofing crew finishes detailing work, substantial completion triggers a rigorous multi-step inspection process:
- Contractor Internal Punch List: The project superintendent walks the entire roof, checking every seam with a rounded metal seam probe to verify 100% weld integrity. Any cold welds or fishmouths are repaired immediately.
- Manufacturer Field Inspection: For No Dollar Limit (NDL) warranties, a technical field inspector from the material manufacturer visits the building. The inspector checks seam welds, flashing heights, fastener density, drain clamps, and edge metal details.
- Punch List Resolution: If the manufacturer representative finds minor deficiencies (such as an unprobed seam or missing corner reinforcement), the contractor corrects these punch list items within 10 to 14 days.
- Warranty Registration: After approving the completed work, the manufacturer issues the formal NDL warranty certificate. Warranty terms typically range from 15 to 30 years, protecting the building owner against material defects and installation leaks.
Frequently Asked Questions About Commercial Roof Installations
How long does a new commercial roof installation take?
A typical 50,000-square-foot single-ply commercial installation takes 15 to 25 working days from active crew arrival to substantial completion. Pre-install planning, engineering reviews, material submittals, and approvals take an additional 4 to 8 weeks before jobsite work begins.
Can a commercial building remain occupied during roof installation?
Yes, most commercial facilities remain fully operational during installation. Roofing contractors coordinate staging, crane lifts, and material deliveries during off-peak hours to minimize disruption. Specialized safety protocols, dust barriers, and noise management protect tenants, staff, and visitors below.
What is the difference between a contractor warranty and a manufacturer NDL warranty?
A contractor warranty (typically 2 to 5 years) covers installation workmanship and local repairs directly from the roofing contractor. A manufacturer No Dollar Limit (NDL) warranty (10 to 30 years) is backed directly by the material manufacturer. It covers all labor and material costs required to fix leaks caused by material defects or installation errors, without any monetary cap over the lifetime of the coverage term.
Conclusion
A new commercial roof installation is a substantial investment that protects your building’s interior, mechanical systems, inventory, and operations. From pre-job submittal packages and deck verification to staggered insulation layers, heat-welded seams, and final manufacturer NDL inspections, every phase demands attention to detail.
Partnering with an experienced, certified commercial roofing contractor ensures your project hits schedule milestones and complies with local building codes. At Yutzy Roofing Service, LLC, we bring decades of practical expertise helping business owners across Wisconsin navigate installation logistics smoothly.
Ready to discuss your upcoming project? Explore our full range of Commercial Roofing Services or contact our team today to schedule an expert evaluation.
