
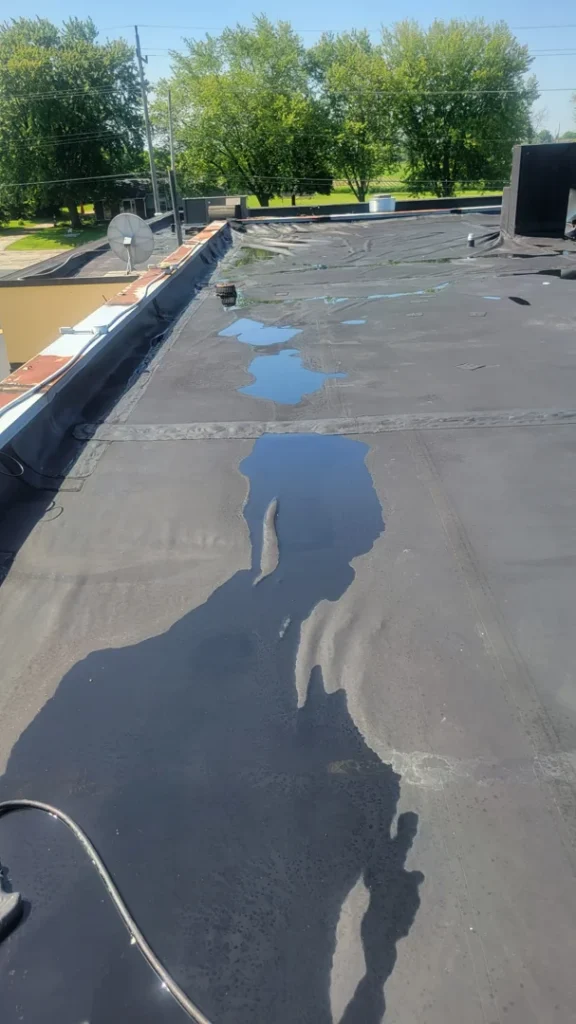
When a Roof Valley Leaks, Your Whole Facility Pays the Price
Fixing a leaking roof valley on a commercial building needs to happen fast — delays turn small repairs into five-figure structural disasters.
Here’s a quick overview of how to stop the leak:
- Locate the leak — Inspect your attic or ceiling for stains, drips, or soft spots directly below the valley line.
- Clear the valley — Remove debris, dirt, and standing water from the flashing channel.
- Apply a temporary seal — Use roofing cement or self-adhesive membrane to stop active water intrusion.
- Inspect the decking — Probe the roof deck on both sides of the valley for rot or soft spots.
- Replace failed flashing and underlayment — Install new self-adhering ice-and-water membrane and metal valley flashing from bottom to top.
- Reinstall and seal roofing material — Ensure fasteners stay at least 6–10 inches from the valley centerline.
- Test the repair — Run a controlled water test and monitor the attic during the next three major rain events.
Why this matters: Roof leaks originating at flashing details account for 80–90% of all roof leaks. Ignore a valley leak and a $350–$1,000 repair can escalate to $12,000–$50,000+ in structural damage within two years. Mold spores begin colonizing wet wood within just 24–48 hours.
Wisconsin’s brutal freeze-thaw cycles — up to 120 per year — make commercial roof valleys especially vulnerable. What starts as a minor drip after a storm can quietly rot your roof deck across both slopes before you ever see a ceiling stain inside.
I’m Josh Yutzy, and at Yutzy Roofing Service LLC we’ve been fixing leaking roof valleys on commercial properties across Wisconsin since 1995. Over nearly three decades, we’ve seen how quickly valley failures escalate when Wisconsin winters get involved.
Understanding Commercial Roof Valleys and Why They Leak
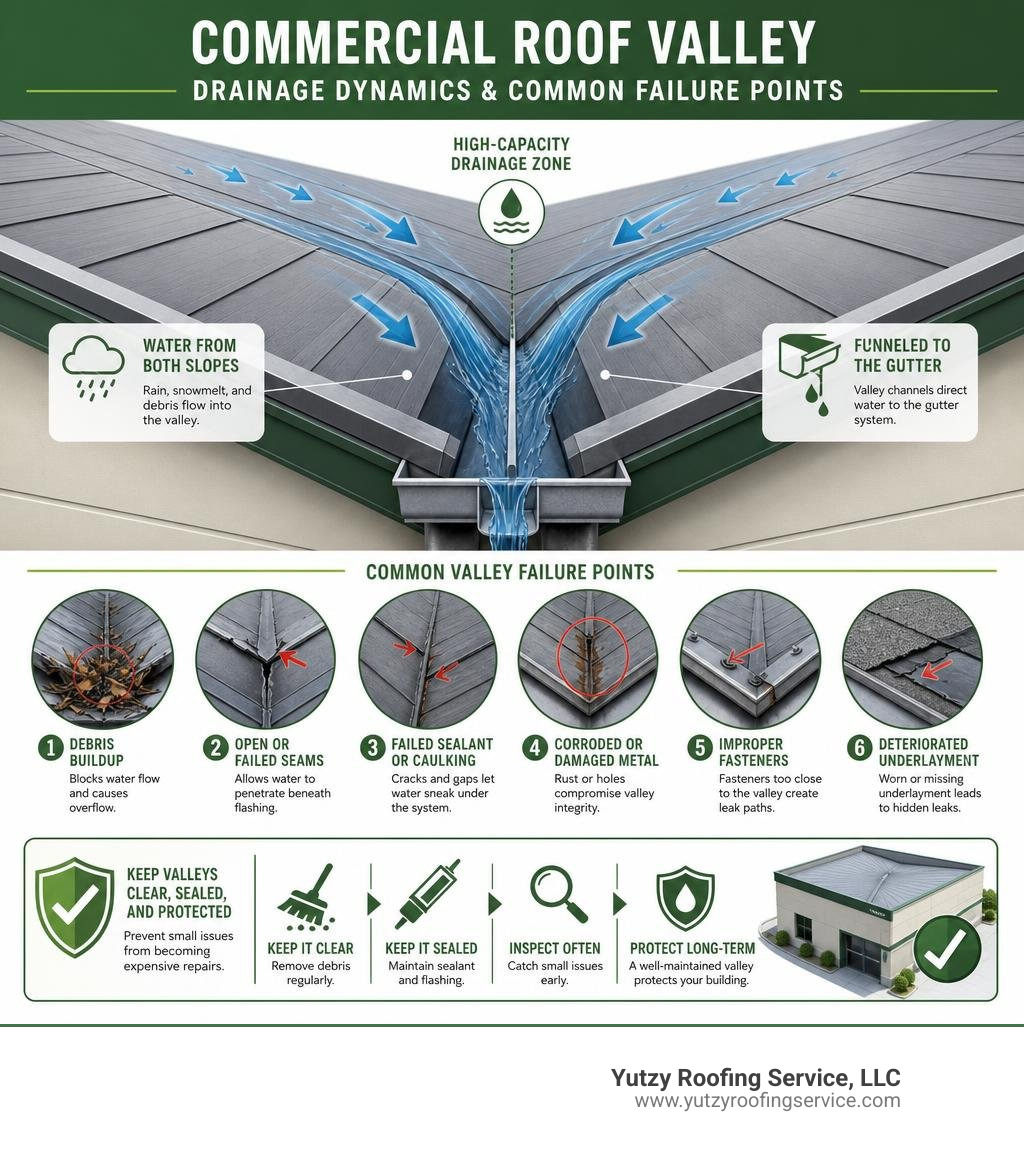
To understand why roof valleys are so prone to failure, we have to look at the basic geometry of a commercial roof. A roof valley is the V-shaped channel formed where two sloping roof planes intersect. Instead of shedding water away like a ridge, a valley does the exact opposite: it acts as a high-capacity drain, funneling massive volumes of water from both slopes down into your gutter system.
Because of this geometry, valleys handle a disproportionate amount of water during heavy downpours. They also experience the slowest runoff speeds because the effective slope of a valley is always shallower than the slope of either adjoining roof plane. When water pools or slows down, any tiny vulnerability in the flashing, underlayment, or sealant becomes an open invitation for a leak.
In our service areas—from Marshfield and Wausau to Madison and Green Bay—the local climate adds extreme physical stress to these channels. The constant expansion and contraction caused by seasonal temperature swings, combined with heavy snow loads, can tear apart weak seams. If you want to dive deeper into these vulnerabilities, check out our guide on Common Problems with Roof Valleys and How to Solve Them.
Types of Commercial Roof Valleys
Commercial facilities utilize several different types of roof valleys depending on the architectural style and primary roofing materials. Each system handles water shedding differently and carries its own unique risk profile.
- Open Metal Valleys: These are constructed with a heavy-gauge metal flashing lining the center of the valley (often heavy-duty aluminum, copper, or galvanized steel). The roofing membrane or shingles stop short of the center, leaving the metal exposed. This is highly durable and sheds debris efficiently, making it a great choice for low-slope commercial applications.
- EPDM Valleys: Ethylene Propylene Diene Monomer (EPDM) is a popular synthetic rubber membrane for low-slope commercial roofs. In EPDM valleys, a continuous sheet of rubber is laid down the valley, and adjoining sections are adhered using heavy-duty seam tape or liquid adhesives.
- TPO Valleys: Thermoplastic Polyolefin (TPO) systems use heat-welded seams. In a TPO valley, the sheets are hot-air welded together to create a monolithic, highly water-resistant barrier. While extremely reliable when installed correctly, poor welds can fail under extreme thermal expansion.
| Valley Type | Primary Material | Expected Lifespan (WI/MN Climates) | Primary Leak Risk Factor | Maintenance Level |
|---|---|---|---|---|
| Open Metal | Heavy-duty Aluminum/Steel | 15–25 Years | Sealant failure at transitions; fastener backing | Moderate (Requires seasonal debris clearing) |
| EPDM | Synthetic Rubber | 12–20 Years | Seam adhesive degradation; puncture damage | Low to Moderate (Seam checks required) |
| TPO | Thermoplastic Polyolefin | 15–22 Years | Poor hot-air welds; cold welds splitting | Low (Highly durable if welded properly) |
Primary Causes of Valley Failures in Commercial Buildings
Understanding why your commercial valley is failing is the first step toward a permanent fix. In our decades of experience servicing commercial properties in Eau Claire, Fond Du Lac, and Rochester, we have identified four primary culprits:
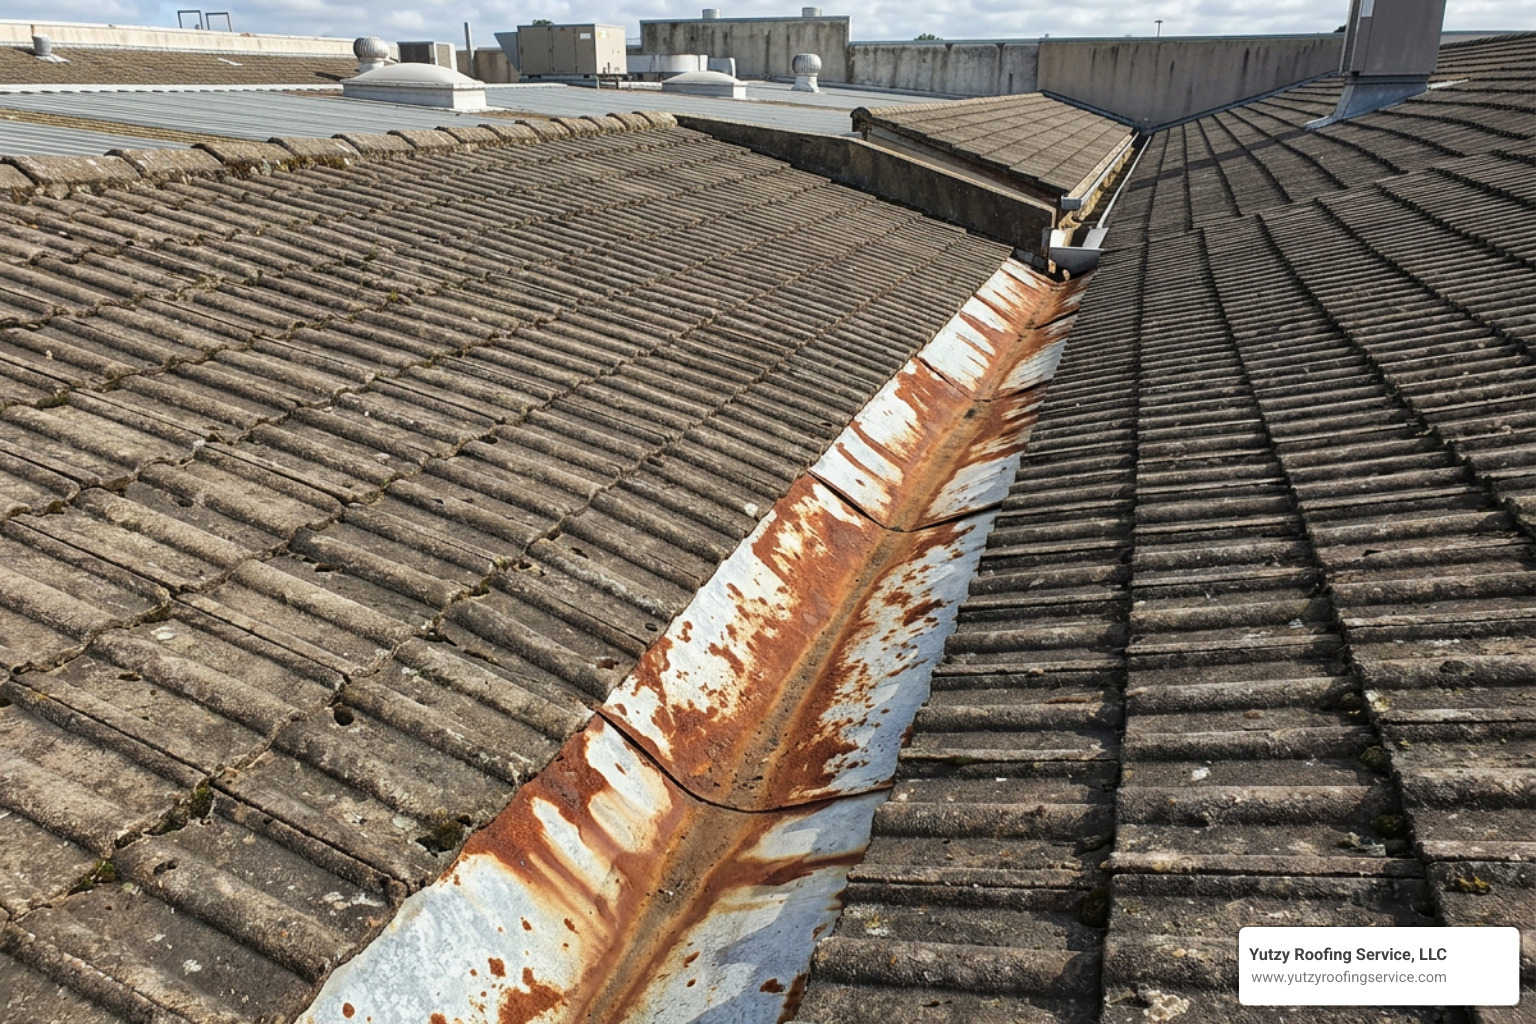
- Damaged or Rusted Flashing: Over time, older metal flashing can rust, crack, or develop pinholes. Thermal expansion can also cause the metal to buckle, pulling fasteners loose and tearing the surrounding underlayment.
- Improper Fastener Placement: This is a classic installation error. If installers drive nails or fasteners within 6 to 10 inches of the valley centerline, they are placing a hole directly in the primary water channel. Water will eventually find these fasteners, rust them out, and leak straight into the building.
- Debris Accumulation: Leaves, branches, and windblown dirt love to settle in roof valleys. This debris acts like a sponge, holding moisture against the roof surface and creating a dam that forces water sideways under the roofing membrane.
- Ice Dams: During cold Wisconsin and Minnesota winters, snow melts on the warmer upper sections of the roof and runs down into the cold valley, where it refreezes. This ice buildup backs up water, forcing it upward and under the protective roof layers.
To prevent these issues from turning into major structural headaches, it helps to understand the broader picture of commercial roof degradation. Read our comprehensive resource on 8 Common Causes of Roof Damage and How to Repair Them to keep your facility protected.
How to Identify a Leaking Valley on a Commercial Roof
Because water can travel a long distance along rafters, beams, and deck panels before actually dripping into your workspace, finding the exact source of a leak can be incredibly tricky. However, roof valleys are always a primary suspect. To save yourself time and frustration, check out our guide on Finding Your Roof Leak Without Losing Your Mind to trace leaks back to their origin.
Interior Warning Signs in Commercial Facilities
You don’t always have to climb onto the roof to know you have a problem. Keep a close eye out for these interior red flags:
- Drywall and Ceiling Tile Discoloration: Classic brown rings or yellowing stains on your ceiling tiles or drywall seams are a dead giveaway. If these stains align roughly with the path of an overhead roof valley, you have an active leak.
- Musty Odors and Mold: If your warehouse, office, or mechanical room suddenly smells damp and musty after a rainstorm, moisture is getting trapped in your insulation. Mold colonizes wet surfaces within 24 to 48 hours.
- Active Drips During Heavy Rain: If water only drips during heavy downpours or rapid snowmelt, it indicates a high-volume drainage failure, which points directly to the valley.
If you are noticing these warning signs, you are likely dealing with an active leak that requires immediate professional attention. Explore our dedicated resources under Tag: Leaking Roof to learn more about managing active water intrusion.
Exterior Inspection Techniques
If it is safe to do so, a visual exterior inspection can confirm your suspicions.
- Look for Flashing Damage: Using binoculars or a drone, inspect the metal valley flashing for signs of rust, buckled metal, or exposed fasteners that have backed out of the deck.
- Check for Standing Water and Debris: If you see piles of leaves, pine needles, or standing puddles in the valley, water is not draining properly.
- Identify Failed Sealants: Look for cracked, peeling, or missing caulking along the edges where the roofing membrane meets the metal valley flashing.
The Step-by-Step Guide to Fixing a Leaking Roof Valley
Before attempting any roof work, safety must be your absolute top priority. Commercial roofs are high, often steep, and incredibly dangerous—especially near valleys where two slopes meet. Always use a professional-grade fall protection harness system, secure your ladders properly, and wear soft-soled, non-slip footwear.
According to the Roof Valleys and Penetrations Sealed | Building America Solution Center, a durable valley system requires a clean, flat deck surface, a high-quality self-sealing bituminous membrane, and properly integrated flashing to ensure long-term waterproof protection.
Temporary Solutions for Fixing a Leaking Roof Valley
If you are dealing with an active leak and need to protect your inventory, equipment, or interior spaces while waiting for a professional crew, a temporary patch can buy you some time. That a temporary fix is just a stopgap—it will typically only last 6 to 18 months before weather exposure degrades the patch.
Here is how to apply a temporary seal:
- Clean the Area: Use a stiff-bristle brush to clear away all dirt, leaves, and loose debris from the valley. The surface must be completely dry for sealants to adhere.
- Apply Heavy-Duty Roofing Cement: Spread a thick, generous layer of professional-grade wet-dry roofing cement over the damaged area, cracks, or exposed fasteners.
- Embed Reinforcing Fabric: For larger cracks or holes, press a strip of roofing mesh or reinforcing fabric directly into the wet cement, then apply another layer of cement over the top, feathering the edges to shed water.
- Use Self-Adhesive Membrane Patches: If you have access to a roll of self-adhering waterproofing membrane, cut a patch that extends at least 6 inches past the damaged area in all directions, press it firmly into place, and roll it flat to eliminate air bubbles.
For a visual demonstration of these quick-fix techniques, watch this helpful Roof Valley Leak Repair Video on YouTube.
Professional Methods for Fixing a Leaking Roof Valley
For a permanent, worry-free solution that protects your commercial facility for decades, a professional rebuild or restoration is required. This process involves stripping the valley down to the structural deck and rebuilding the waterproofing layers from scratch.
To understand the scope of these professional solutions, read about What Are Common Types of Roof Damages and Repairs. Here is how we perform a permanent, high-quality valley restoration:
- Expose the Roof Deck: We carefully remove the existing roofing membrane, shingles, and old underlayment down to the bare wood or steel decking along the entire length of the valley.
- Inspect and Repair the Decking: We inspect the structural deck for any soft spots, rot, or water damage. Any compromised decking is cut out and replaced to ensure a solid foundation.
- Install Self-Adhering Bituminous Membrane: We apply a heavy-duty, self-adhering ice-and-water shield directly to the clean deck. This membrane is centered in the valley and extends at least 36 inches up both slopes to prevent leaks from ice dams.
- Install Premium Valley Flashing: We lay down a heavy-gauge, corrosion-resistant metal flashing (usually W-style flashing, which features a center rib to prevent water from rushing across from one slope and splashing under the opposite side). The metal is secured only at the outer edges—never through the center.
- Integrate the Roofing Membrane: We reinstall the commercial roofing material (such as EPDM, TPO, or high-performance architectural shingles) over the flashing edges. All fasteners are kept a minimum of 10 inches away from the valley centerline, and transitions are sealed with commercial-grade adhesives or hot-air welds.
The High Cost of Ignoring Commercial Roof Valley Leaks
When you run a business, it is easy to put off roof repairs. However, delaying a valley repair is one of the most expensive mistakes a facility manager can make. Because valleys handle the highest volume of water on your roof, a leak here is never a minor issue.
If ignored, water will continuously seep into your roof deck. Within 6 to 24 months, rot can spread 4 to 8 feet laterally from the valley centerline across both adjoining slopes. This rapidly compromises the structural integrity of your roof, leading to sagging decks and, eventually, catastrophic ceiling collapses.
Furthermore, mold spores will colonize wet wood, insulation, and ceiling tiles within 24 to 48 hours of sustained moisture. Remediation costs for structural mold can easily run into tens of thousands of dollars, not to mention the health hazards it poses to your employees and tenants. What could have been a simple, localized repair can quickly escalate into a massive financial burden.
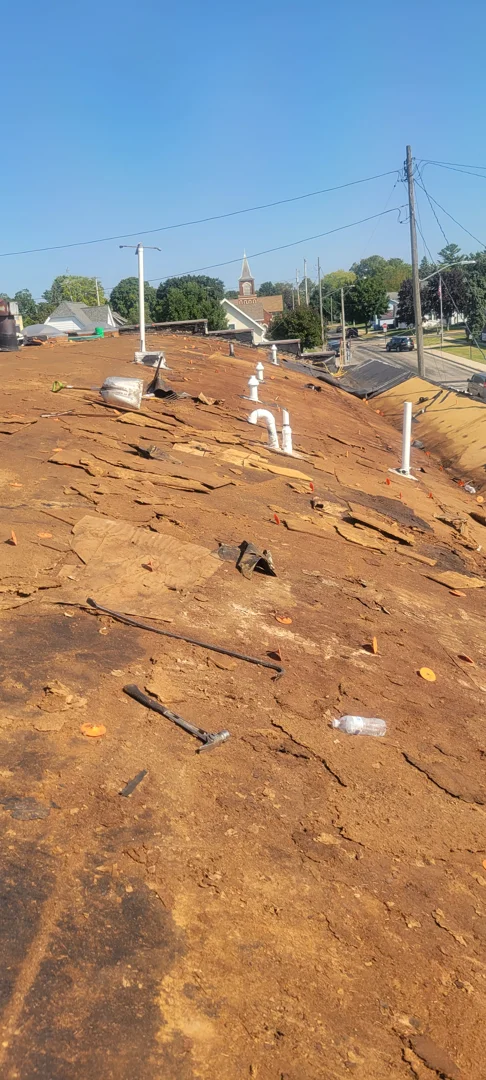
If you suspect you have water getting into your building, do not wait. Check out our resources on Tag: Roof Leaks to understand how quickly water damage can spread throughout a commercial structure.
Frequently Asked Questions about Commercial Roof Valleys
How long does a temporary valley repair last?
A temporary repair using roofing cement, caulk, or adhesive patches is strictly a short-term stopgap. Under typical Wisconsin and Minnesota weather conditions, these materials will degrade, crack, and lose adhesion within 6 to 18 months. They should only be used to protect your facility until a professional roofing crew can perform a permanent repair.
Can commercial roof valleys be restored without full replacement?
Yes! If the structural decking underneath is still dry and solid, we can often restore the valley without a full, costly roof replacement. At Yutzy Roofing Service, we specialize in high-performance commercial roof restorations, including spray foam coatings and fluid-applied metal restorations. These advanced systems seal all seams, valleys, and penetrations into a seamless, fully waterproof barrier, saving you up to 50% compared to the cost of a complete roof tear-off.
How do freeze-thaw cycles affect Wisconsin roof valleys?
Wisconsin’s climate is incredibly tough on roof valleys, delivering 80 to 120 freeze-thaw cycles per year. When snow melts and refreezes in the valley, it creates ice dams that expand and lift up the edges of the roofing membrane. Additionally, the constant shift between freezing and thawing causes metal flashing to expand and contract rapidly, which backs out fasteners, cracks old sealants, and tears seams apart.
Conclusion
Fixing a leaking roof valley is not a project that can wait for next season. Every rainstorm and winter freeze will expand the damage, threatening your inventory, equipment, and structural safety.
At Yutzy Roofing Service, LLC, we specialize in commercial roofing restoration, spray foam coatings, metal roof restorations, EPDM repairs, and comprehensive preventative maintenance. We are proud to serve commercial property owners throughout Wisconsin and Minnesota, with dedicated teams in:
- Marshfield, WI
- Appleton, WI
- Eau Claire, WI
- Fond Du Lac, WI
- Green Bay, WI
- Madison, WI
- Wausau, WI
- Mankato, MN
- Rochester, MN
We stand behind the quality of our craftsmanship, which is why we offer an industry-leading, up to 18-year non-prorated renewable warranty on our commercial restoration systems.
Don’t let a minor valley leak turn into an expensive structural headache. Learn more about protecting your facility by reading our guide on Staying Dry: How to Fix a Roof Leak and Mistakes to Avoid, or contact the team at Yutzy Roofing Service today to schedule a professional inspection and secure your building’s future.
