
Why a Leaky Flat Roof Is a Problem You Can’t Afford to Ignore
When you need to fix a leaky flat roof, the fastest path forward is to locate the source, prepare the surface, and apply the right repair material for your roof type. Here’s a quick overview:
How to fix a leaky flat roof — quick steps:
- Find the leak — Inspect flashing, seams, drains, and low spots where water pools
- Clean and dry the area — Remove debris, dirt, and moisture completely
- Choose the right material — Match your repair product to your roof type (EPDM, felt, GRP, or bitumen)
- Apply the repair — Use a patch, sealant, or liquid membrane extending well beyond the damaged area
- Test the repair — Use a hose to confirm the fix before the next rainstorm
- Prevent future leaks — Clear drains, schedule annual inspections, and apply protective coatings
Flat roofs are almost twice as likely to leak as sloped roofs — and in Wisconsin, where winters are brutal and summers push membranes to their limits, that risk is even higher. The good news? Nearly 80% of flat roof leaks can be fixed without a full tear-off, often for less than $100 in materials.
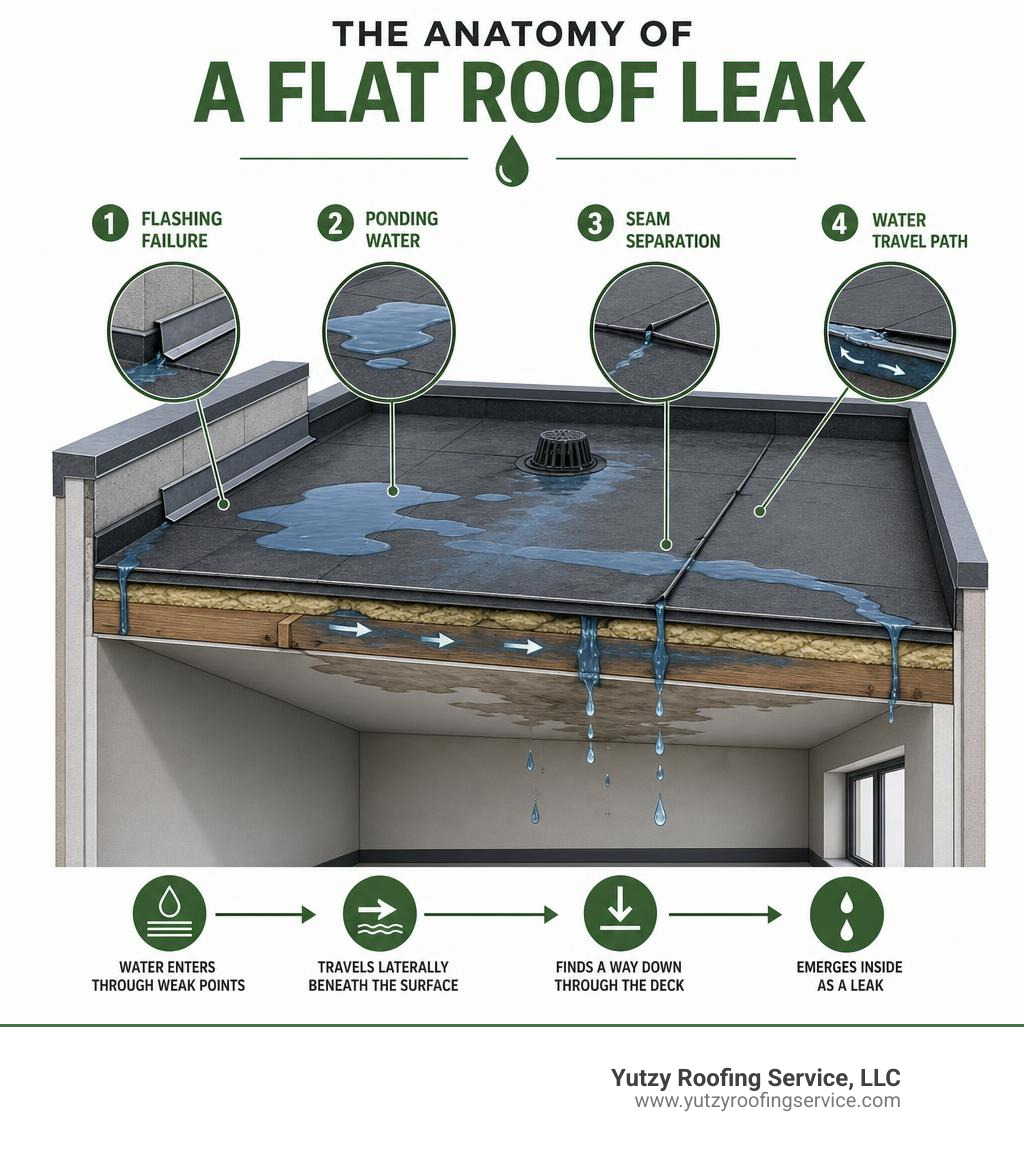
The tricky part isn’t always the repair itself. It’s finding the actual leak. Water travels sideways along roof decks and joists before it ever drips through your ceiling — meaning the wet spot you see inside could be several feet away from where water is actually getting in.
Acting fast matters. A small seam failure or cracked flashing left unaddressed can soak insulation, rot the roof deck, and turn a simple repair into a costly replacement.
I’m Josh Yutzy, and our family business has been repairing and restoring commercial flat roofs across Wisconsin since 1995 — we’ve seen how the right approach to fixing a leaky flat roof can save property owners thousands of dollars and years of headaches. Let’s walk through exactly how to do it right.
Why Flat Roofs Leak: Common Causes and Vulnerabilities
Commercial flat roofs are fantastic for maximizing usable building space and housing heavy HVAC systems, but they lack the natural gravity-assisted drainage of pitched roofs. Because flat roofs must rely on a subtle slope (typically at least 1/4 inch per foot) to guide water to drains, any slight structural shift, poor installation, or aging of materials can lead to water intrusion.
Understanding these vulnerabilities is key to diagnosing the issue before you try to fix a leaky flat roof.
The Impact of Ponding Water and Poor Drainage
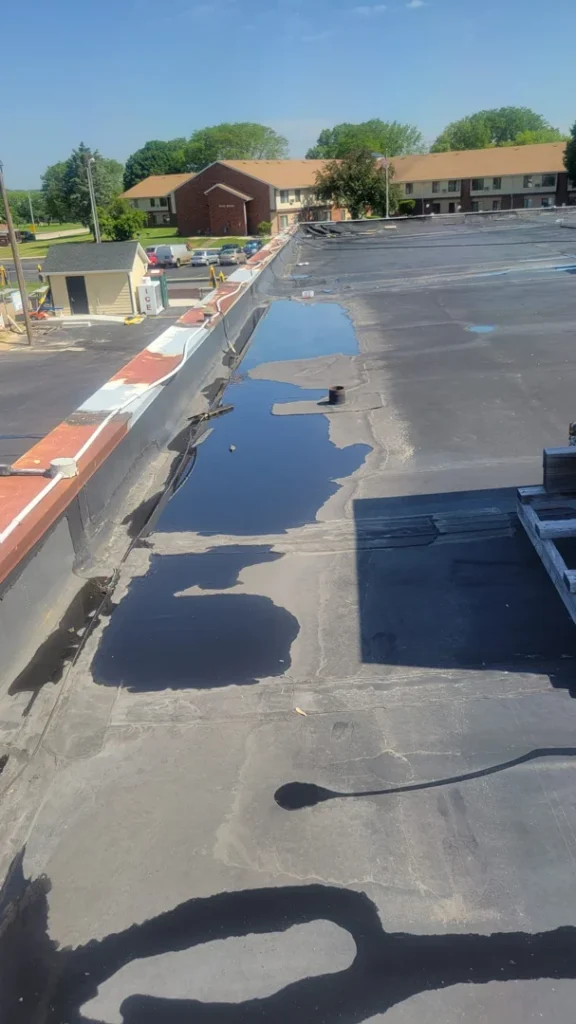
Ponding water is defined as water that remains on a roof surface for longer than 48 hours after a rainstorm. When water sits on a roof for too long, it acts like a magnifying glass under the sun, accelerating UV degradation of the membrane. In places like Eau Claire, WI, or Rochester, MN, standing water undergoes extreme freeze-thaw cycles that can rapidly split seams.
Over time, this standing weight can cause the roof deck to sag, creating a deeper depression that collects even more water. This vicious cycle is why managing standing water is critical; you can read more about The Harmful Effects of Pooling Water on Commercial Roofs to see how it slowly breaks down even the toughest membranes.
Most ponding water issues stem from clogged drains, scuppers, or gutters. When debris like leaves, dirt, or windblown trash blocks your drainage systems, water backs up across the flat surface. To keep your commercial system running smoothly, check out our guide on How to Avoid Ponding Water on Your Commercial Roof in Eau Claire WI.
Seam Failures and Flashing Degradation
If ponding water is the catalyst, failed seams and flashing are the entry points. In fact, over 90% of flat roof leaks originate at the flashing—the metal or membrane transition pieces that seal the edges of the roof, parapet walls, chimneys, and HVAC curbs.
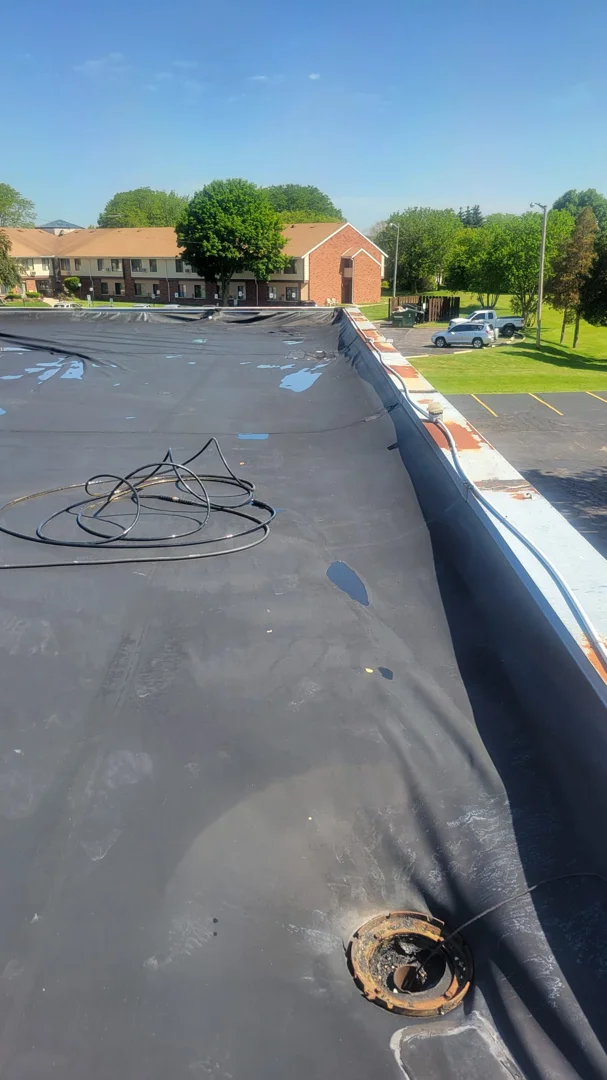
As temperature swings occur throughout the year in Wisconsin and Minnesota, different building materials expand and contract at different rates. This thermal expansion puts immense stress on the joints. Eventually, the caulking, sealant, or adhesive holding the flashing in place cracks, dries out, and pulls away.
Similarly, the seams of sheet membranes (like EPDM or TPO) can degrade over time due to weather exposure, allowing water to seep underneath. Learn how to spot these early signs of trouble in Your Guide to Roof Leak Repairs: How to Spot a Leaking Roof.
How to Find and Diagnose the Source of a Leak
Finding the exact source of a leak on a flat roof is a bit like detective work. Because water can travel laterally along joists and low-slope decks for 10 feet or more before dripping into your facility, you can’t simply assume the leak is directly above the ceiling puddle.
Tracing Water Paths and the Hose Test
To find the leak without losing your mind, start from the inside of your building and work your way out. Measure the distance from the interior drip point to the nearest exterior walls. Transfer those measurements to the roof surface to establish a starting point for your visual inspection. For a detailed breakdown of this tracing process, see our guide on Finding Your Roof Leak Without Losing Your Mind.
Once you’re on the roof, inspect the area within a 10-foot radius of your measurement. Look for:
- Holes, punctures, or tears in the membrane
- Separated seams or lifting flashing
- Cracks or “alligatoring” on bitumen surfaces
- Spongy or soft spots underfoot, which indicate water-logged insulation
If a visual check doesn’t reveal the culprit, perform a controlled hose test. Grab a helper and a garden hose. Starting at the lowest point of the suspected area (usually near a drain), spray water gently onto the roof for 10 to 15 minutes. Have your helper stay inside to watch for water entry. Slowly work your way uphill, testing one small section at a time. This method isolates different penetrations and seams so you can pinpoint the exact breach.
When to Call the Professionals for Advanced Diagnostics
Sometimes, leaks are “ghosts”—they only appear during wind-driven rain or when the temperature drops rapidly. If you’ve tried the hose test and still can’t find the source, or if you suspect water is trapped deep within your insulation layers, it is time to bring in professional equipment.
Professional commercial roofers use advanced diagnostics like infrared thermography. Because wet insulation retains heat longer than dry insulation, a thermal camera can highlight temperature differences after sunset, showing exactly where water is trapped under the membrane.
If you are dealing with persistent leaks or suspect structural damage to your deck, read about Flat Roof Leak: When to Call the Professionals in Madison WI to understand when DIY patch-ups are no longer safe or effective.
Step-by-Step Guide to Fix a Leaky Flat Roof
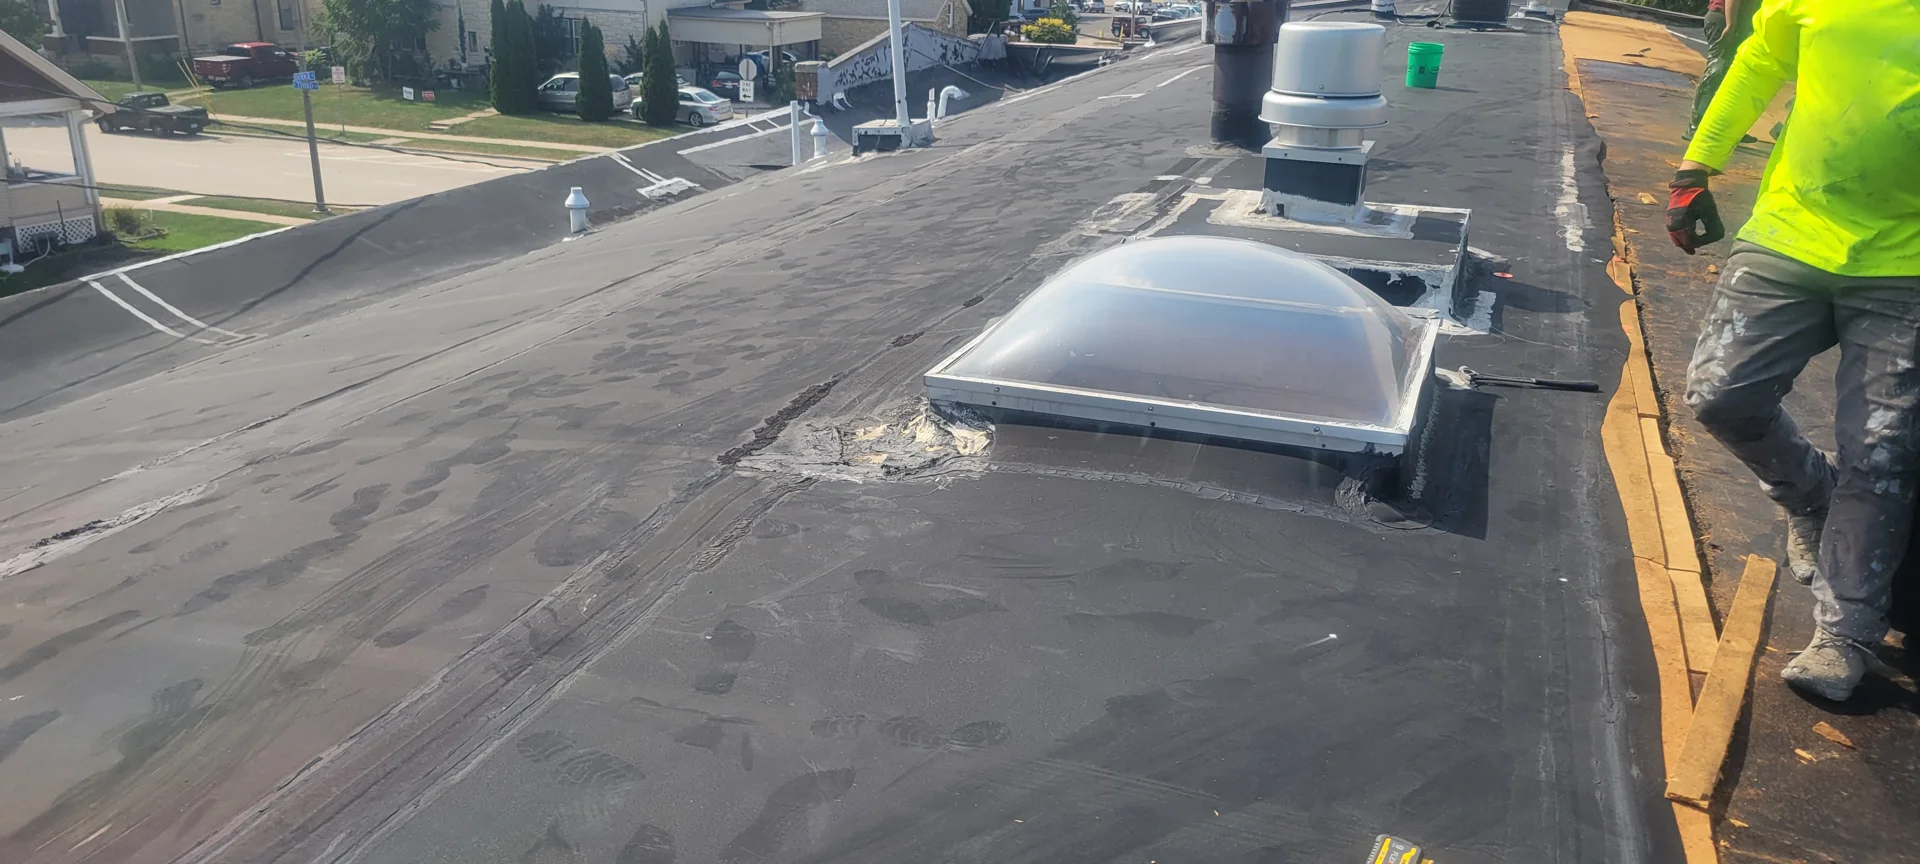
Once you have identified the source of the leak, it’s time to execute the repair. Whether you are doing a quick patch or prepping for a larger restoration, the steps remain the same: clean, dry, prime, and seal.
Essential Tools and Materials to Fix a Leaky Flat Roof
Before you start, gather your tools. The exact materials depend on your roof type, but a standard commercial flat roof repair kit should include:
- Cleaning tools: A stiff-bristled broom, wire brush, and a compatible cleaner (like EPDM cleaner or a high-quality degreaser)
- Cutting tools: Heavy-duty utility shears or a utility knife
- Repair materials: Compatible primers, sealants, patch kits, or liquid-applied membranes
- Application tools: A paintbrush, roller, and a handheld silicone seam roller (essential for smoothing out air bubbles in patch membranes)
- Safety gear: Heavy-duty gloves, safety glasses, and non-slip footwear
For a deeper dive into choosing high-performance repair kits, you can read about How to repair a leaking flat roof – Flat Roofing Systems.
Preparing the Substrate and Surface Cleaning
The golden rule of flat roofing is that a repair is 90% preparation and 10% application. If you apply sealants or patches over a dirty, dusty, or damp surface, the repair will fail within a few months.
- Clear the debris: Sweep away all dirt, moss, gravel, and standing water from the repair zone.
- Scrub the membrane: Use a stiff brush and a compatible cleaner to scrub away grease, oxidized oils, and embedded grime.
- Let it dry completely: The substrate must be bone-dry before applying adhesives or primers. You can use a leaf blower to speed up this process.
- Prime the surface: If you are working with EPDM or TPO, apply a dedicated membrane primer. This chemically prepares the rubber to bond permanently with the patch. Let the primer dry until it is tacky to the touch (usually 20-30 minutes).
Temporary vs. Permanent Solutions to Fix a Leaky Flat Roof
If it is pouring rain and you have a major leak threatening your inventory or equipment, you may need to apply a temporary “emergency” fix.
- Temporary fixes: Liquid polyurethane (PU) sealants or asphalt-based wet-patch mastics can be applied in damp or emergency conditions. These buy you time but should be replaced with a permanent fix once the weather clears.
- Permanent fixes: Permanent repairs require using matching membrane patches with commercial-grade adhesives, or applying high-solid liquid-applied silicone membranes that chemically fuse to the roof.
To help you decide on the best strategy for your facility, explore our guide on What to Do About a Leaky Commercial Roof and learn how we structure permanent Flat Roof Leak Repair: How Does It Work programs.
Tailoring the Repair to Your Membrane Type (EPDM, Felt, GRP, Bitumen)
Different flat roof membranes require completely different repair chemistries. Applying the wrong product can chemically dissolve your roof, turning a minor leak into a major disaster.
| Roof Membrane Type | Common Leak Causes | Best Permanent Repair Method | Critical Tip |
|---|---|---|---|
| EPDM (Rubber) | Separated seams, punctures | EPDM patch with rounded corners, EPDM primer, and seam adhesive | Never use asphalt-based products or tar on EPDM; it melts the rubber. |
| Built-Up Felt (BUR) | Cracking, blistering, UV wear | Cold bitumen adhesive, felt patch, or fiber-reinforced liquid coating | Make sure to embed slate granules into wet coatings to protect against UV. |
| GRP (Fibreglass) | Stress cracks, joint movement | Sanding, applying fiberglass resin matting, and applying a topcoat | Sand the repair area thoroughly to ensure the new resin bonds to the old GRP. |
| Bitumen / Asphalt | Alligatoring, seam splits | Modified bitumen torch-on patch or high-build elastomeric sealant | Ensure the surface is completely free of loose gravel before patching. |
For detailed instructions on working with fiberglass systems, check out Repairing a Flat Roof with Fibre Glass Sheeting \| DIY Doctor.
Common Mistakes to Avoid During DIY Repairs
- Using the wrong materials: The most common mistake we see in Wisconsin is property owners slathering black asphalt plastic cement (tar) over EPDM or TPO membranes. The petroleum in the tar chemically degrades the synthetic rubber, causing it to swell, wrinkle, and dissolve.
- Leaving sharp corners on patches: If you cut a square patch, the corners will catch on debris and wind, eventually peeling back. Always round the corners of your membrane patches.
- Trapping moisture: Patching over wet insulation or a damp membrane traps moisture inside. When the sun heats the roof, that water vaporizes, expands, and creates massive blisters that destroy the new patch.
Post-Repair Maintenance and Prevention Strategies
Once your patch is applied and cured, your work isn’t quite done. Regular maintenance is the only way to ensure your flat roof reaches its full lifespan (which can be up to 50 years for high-quality EPDM).
- Clean gutters and drains: Clear out leaves, silt, and debris at least twice a year (late spring and late fall).
- Schedule professional inspections: Have a professional roofer inspect your system annually to catch minor seam splits before they become active leaks.
- Apply protective coatings: Applying a high-quality silicone or acrylic roof coating can seal hairline cracks across the entire roof surface and lower roof temperatures by reflecting UV rays.
To learn more about setting up a proactive care plan, read The Ultimate Guide to Flat Roof Coating Experts and Maintenance Plans.
Frequently Asked Questions about Flat Roof Repair
How long does a flat roof patch repair last?
A professionally applied flat roof patch using matching materials and proper primers can easily last 5 to 10 years. However, a DIY patch applied in a hurry over a dirty or damp surface often fails within a single season. The lifespan depends entirely on the quality of your surface preparation.
Can I coat my entire flat roof instead of patching it?
Yes! If your roof membrane is aging and has multiple small leaks, but the underlying insulation and wood deck are still dry and structurally sound, coating the entire roof is an excellent choice.
Applying a seamless silicone coating—like a commercial restoration system—can seal all existing minor leaks, prevent future ones, and add 10 to 18 years of life to your roof at a fraction of the cost of a full replacement. You can learn more about these restoration systems in our overview of Commercial Roof Leak Repair: Top Solutions.
What is the most common cause of flat roof leaks?
Failed flashing around roof penetrations (like vents, pipes, and HVAC units) and separated seams account for over 90% of all flat roof leaks. Ponding water that sits for more than 48 hours is the primary contributor to these failures. If you are experiencing recurring leaks in the Appleton area, read our guide on Flat Roof Leak Repair in Appleton WI for localized advice.
Conclusion
When you need to fix a leaky flat roof, acting quickly and using compatible, high-quality materials is the key to protecting your commercial property. While minor punctures and clean seam splits can often be addressed with basic DIY methods, larger issues—like wet insulation, sagging decks, or widespread seam failures—require professional restoration.
At Yutzy Roofing Service, LLC, we specialize in high-performance commercial roofing restoration, EPDM repairs, and seamless spray foam and silicone coatings. Our systems are designed to withstand the harshest Wisconsin winters and hot summers, and we back our work with up to an 18-year non-prorated renewable warranty.
Whether your building is in Madison, Appleton, Wausau, Eau Claire, Green Bay, or Mankato, MN, we are here to help you restore your roof without the mess, stress, or high cost of a full tear-off.
Ready to secure your roof for the long haul? Check out our guide on Fixing your flat roof without getting buried in gravel or contact us today to schedule your professional roof inspection!
